Series: All Victron RV Electrical
This series covers our build of an all Victron electrical system. Take what is helpful and leave the rest—build your system for your own needs. Cheers!
Note: We are not sponsored by Victron, but we are Amazon and Tnutz affiliates.
Part 4: Wiring and Configuration
Part 5: (Future Blog Post) Alternator Charging
Introduction
In 2021 we considered switching to a van from our ORV travel trailer. We like the trailer but the logistics can be challenging—truck, trailer, and bike rack are 55 feet long. With a van you can park and go almost anywhere.
In August 2022 we ordered a Ford Transit Cargo van. They told us it would likely be 6 months before it arrived, but we would receive monthly updates. These updates became less frequent as the months rolled on. Based on what folks said on the Ford Transit Forum it could take a year or longer.
I planned to build my own power system as I had done previously, which evolved into a DIY of most of the conversion. Going this route—best case—it would be semi-functional as a camper for a long while; a full van build can take a couple years.
We considered other options, such as a standard pickup or popup camper. We like the lighter weight and lower profile of the latter. Also, since we planned to do the build ourselves, a simple popup topper, rather than a fully contained popup camper, was an interesting option.
A popup topper had clear advantages. It would be semi-functional out of the gate since it comes with a bed. Also, this build would be smaller in scope but similar to a van, which would provide learning lessons for the future and help move this project along.
Therefore, in January 2023 we cancelled our van order and purchased a Four Wheel Camper Project M topper. At that point I narrowed my focus toward a specific power system plan.

In this post I cover the big decisions that were made, including major component choices for the system.
System Requirements
- [Requirement] The system is capable of running an electric refrigerator/freezer for four days on battery power.
We wanted to minimize reliance on propane—it’s the least convenient fuel to find on the road. This means using other energy sources such as electricity where feasible; for example, a fridge that is all electric rather than propane, and a diesel heater.
The most important electrical load from our perspective is refrigeration. On short one or two day trips an ice chest is OK, but on longer trips finding and maintaining ice is a pain in the butt. Food spoils quickly and water from melted ice gets into your food in surprising ways. Also, when we are away from the camper for several days on a backpack the fridge will need to run solely on battery power.
- [Goal] Make permanent changes to the Project M and truck only if necessary.
We purchased a Dometic DFX DZ75, chest style refrigerator/freezer. We went with the chest style for it’s portability and it does not require explicit ventilation ducting. Had we gone with an upright fridge we would have needed to cut a vent hole in the Project M, making it more difficult to sell in the future.
- [Goal] Major system components are transferable to a van conversion.
Because the Project M and a van are similar with regard to house electrical needs, we considered both for this system. Why? We may switch to a van in the (near?) future, and the same power system could be used.
What Size?
To determine electrical system size or capability for your RV, it helps to think about where you are on the off-grid to all-electric-hookups continuum. Will you rarely have hookups, but when you do will you run an air conditioner or microwave?
We are far into the off-grid side of the spectrum with only occasional hookups. With this in mind, the questions I asked myself were:
- how will the system hold up to large and/or long running electrical loads?
- how will electrical energy be restored?
Large Loads: How big is your inverter?
The ability to handle large loads is mostly determined by inverter wattage rating, since indirectly the inverter is the largest load. Off-grid on battery power all the biggies run through it: microwave, induction cooktop, instant pot, electric kettle; and possibly air conditioner, hot water heater, and space heater. Also consider simultaneous load scenarios, for example you are cooking and microwave, cooktop, and various electronics are all running.
Also important is battery bank continuous current rating—it needs to be sized to support inverter demand. However, once this is achieved your focus for large loads is the inverter.
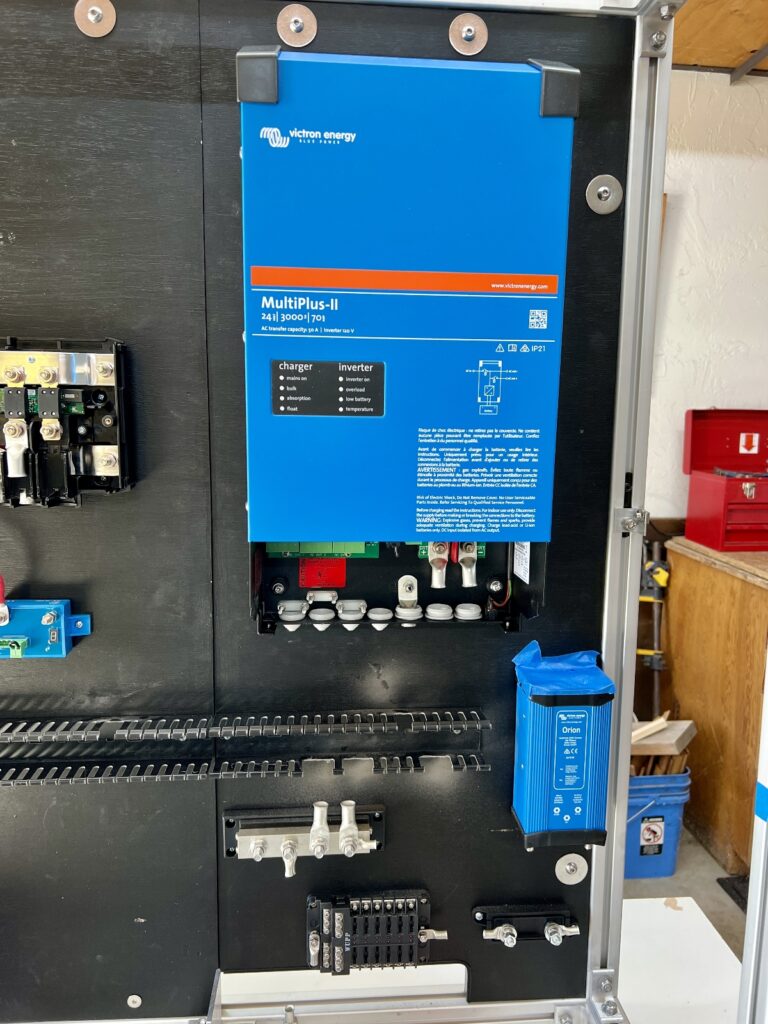
We went a size bigger on the inverter/charger, moving up from 2000VA (1600W) on our travel trailer to 3000VA (2400W) for this new system. The cost difference was minimal (~$100) for the additional load and charge capability. For charging, this was a move up from 80A@12V to 70A@24V—75% more charging watts.

This wattage increase will help alleviate some risk of a system overload. We can run two large loads simultaneously whether hooked to shore power or not, i.e. the microwave and electric kettle. Also, large loads run more efficiently in the middle region, rather than the high end, of the wattage range.
We chose the Multiplus-II over the Multiplus-I for its lesser price and idle power, 13W vs. 20W. Many opt for the older Multiplus-I due to its compact form factor—it is shorter and fatter. I considered various layouts for the Multiplus-II for both the Project M and a van, and decided size would not be an issue.
Long Running Loads: How big is your bank?
A common method to determine how big your battery bank needs to be is to perform an energy audit. In a spreadsheet the wattage and run times of loads used over the course of a day are recorded. Next, compare total energy usage with a proposed bank size, taking into to account how often and by what means the system will be charged.
At a minimum, I recommend performing a few calculations to see if your planned bank size will be in the ballpark. After that, simply adapt usage patterns to the system you have built.
An interesting, albeit extreme, scenario to begin to think about this is running an air conditioner off-grid with battery power. This is both a large and long running load.
You arrive at your boondocking spot and run the A/C for several hours at an average of 1000W at a duty cycle of 0.67—it runs 2/3 of the time. In 4 hours you’ve used 4 * 1000 * .67 = 2.68 kWh. Your bank didn’t start at 100% State of Charge (SOC), the sun is going down and you are not driving so no solar or alternator charging, and you want to cook with your induction cooktop, charge your phones, power computers and/or TV, and use the lights.
If A/C energy usage is 2.68 kWh, and with other loads perhaps 4 kWh total, a bank size of 8 kWh would be warranted. This would allow for 4 kWh (50% SOC) remaining when you shut off the A/C at bedtime.
Aside: When discussing battery bank size, use kilowatt-hours (kWh) rather than amp-hours. This factors in voltage (DC power = volts * amps) so you compare apples to apples whether your system is 12V, 24V, or 48V.
We decided against off-grid A/C and plan to pursue mild temperatures. If we travel to parts of the country that run hot and humid, we may look at purchasing one for intermittent use or when we have hookups.
I made several calculations for different usage scenarios. One was for our requirement of running the fridge for four days on battery power. Once I had a general bank size in mind that would meet our needs I was set to do some shopping.
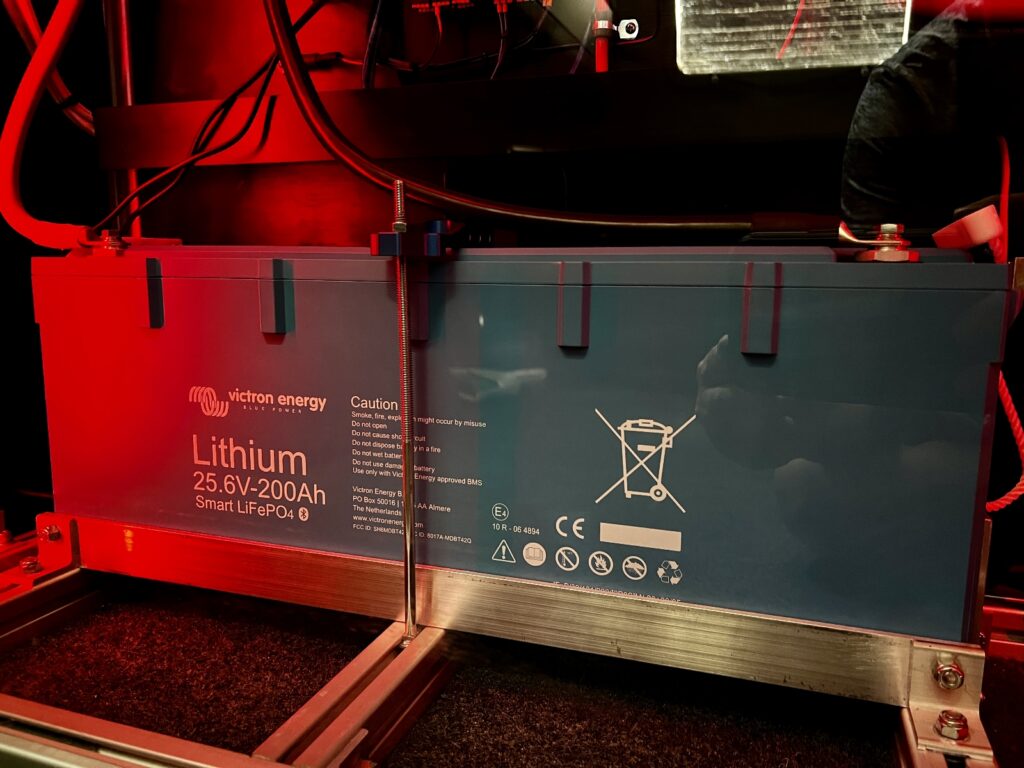
We went with is a single 5.12 kWh battery to keep physical size of the system small and simplify wiring. This is double the bank size of our travel trailer, which made it easy to visualize how our usage and charge behavior might change.

Means of Replenishment
How will electrical energy consumed be restored?
All along I thought we would employ both solar and alternator charging whether we purchased a van, popup camper, or truck topper. Roof space is limited for solar panels on a small RV, and as much as we love solar, we also needed alternator charging to avoid dependence on generator or shore power.
However, by the time we received the project M I decided against solar. There were several reasons, but mostly I did not want to work on the roof. Its metal is beer can thin and dents easily. I would have removed it from the truck to improve access, but getting it back on properly with seals in place might have had its own challenges.
Therefore, we plan to rely on our truck alternators as our primary charging source. Our mode of travel with this rig is to move often, so charging should not be a problem. Our Ford F350 has 377A dual alternators, and I plan to draw up to 100A.
However, there is a problem. The two DC-DC chargers I want to purchase, Victron Orion XS, are currently available in 12V only. The 24V version will not be available until early 2025. In the meantime we will charge via shore power and generator. Fart.
In a future blog post I will cover that install and why I feel the 24V version of the Orion XS was worth the wait.
Why 24 Volts?
Standard 12V systems seamlessly integrate various 12V loads, inverter, solar, and alternator charging.
Why make it complicated?
24V systems have certainly become more common, especially with the van conversion crowd and has been for decades among large boat builders.
In simple terms, switching to 24V doubles voltage. This means that current is cut in half for the power required by a given load.
DC Power = Volts * Amps
Instead of 120A DC to run the microwave, it’s now 60A. That’s a big deal for all those connections—always a weak point in any circuit.
A big reason for making the switch is to avoid difficulty and cost of using larger cable. I went a size bigger on the Multiplus, which, on a 12V system, would have meant a step up from 2/0 to 4/0 cable. 4/0 has a 59% larger cross-sectional area, making it more difficult to cut, crimp, and bend to my will.
Cost wise, at the time of this writing, the 2/0 cable I use is $6.26/foot, while 4/0 is $9.80/foot. Also, my existing hydraulic crimper only goes up to 2/0, so I would have spent an additional $150 – $200 on another crimper. That alone paid for our 24/12 converter.
Did I mention you can use smaller cable? This resulted in savings on 12/2 cable because we bought 100 feet in bulk. This size worked for our Dometic DZ75 fridge at 24V and all remaining 12V loads. If this were a 12V system the fridge would have required 10/2 cable purchased separately.
Another advantage is that our source of 12V, the 24/12 converter, is regulated and stable. Without a regulated output, issues can occur in electronic circuits. For example, older Maxxfans can be damaged at the high voltage required to charge lithium batteries. Also, voltage drop from an unregulated source can cause problems for loads with large startup currents like refrigerators or diesel heaters.
Lastly, a 24V battery bank can be charged faster than an equivalent 12V bank for a given size, and for solar, with smaller and/or fewer charge controllers. For example, the Victron MPPT 100|50 charge controller I installed on our travel trailer can be used to charge either a 12V or 24V system, however it has a hard current limit of 50A. This means it is limited to 700W charging on 12V systems and 1400W on 24V systems.
Why All Victron?
I was already sold on Victron equipment; however, I was not sure an all Victron system, especially their lithium batteries, would be worth the cost. I had been happy with our Battleborn batteries, but those are also pricey, so I considered other manufacturers.
I looked at several low cost lithium batteries. Many had features that I like, including Bluetooth monitoring, temperature display, internal heater, and an on/off switch. What was lacking in various degrees were good quality, documentation, and customer support that people are happy with.

Victron Smart Lithium vs. Battleborn
I decided to take a fresh look at Victron. The price of their Smart Lithium batteries was on par with Battleborn, including the additional cost of an external BMS.
Victron Smart Lithium is smaller and lighter than Battleborn:
- (Victron) one 24V, 200AH battery 25.59″ x 6.42″ x 8.98″ weighs 86 lbs.
- (Battleborn) four 24V, 50AH batteries each 12.76″ × 6.86″ × 8.95″ weighs 31 lbs. or 124 lbs. total
Victron is smaller because each Battleborn contains an internal BMS. Also, Battleborn batteries have more unused space because they are comprised of many cylindrical rather than fewer prismatic (rectangular) cells.
There are advantages to Battleborn’s cylindrical cell design. They can charge and discharge safely through a greater temperature range since cylindrical cells are less impacted by the effects of expansion from heat and gas accumulation, as well as contraction. However, for my needs space is more important.
Finally, Victron is more transparent with regard to internal state by surfacing both temperature and cell data via Bluetooth. On the battery we purchased voltage is displayed for each of its eight cells—we will have a clear indication when a cell begins to fail. It also shows when cell balancing needs to occur via “imbalance” status, which should help to lengthen battery life.
External BMS
Victron’s external BMS design offers unique advantages compared to other manufacturers. Whereas each battery from most manufacturers includes an internal BMS, a single Victron external BMS can communicate with up to 20 batteries facilitating greater communication and coordination. This is manifested in a few key ways.
First by making allow-to-charge (ATC) and allow-to-discharge (ATD) signals available as contacts. In case of low temperature, ATC opens to prevent charging. For low cell voltage, ATD opens to prevent further discharge.
For more complex systems, Distributed Voltage and Current Control (DVCC) can be employed rather than using ATC directly. DVCC provides a way to set system wide parameters for charge current and voltage limits, and does cool things like prioritize solar over grid.
Also, an internal BMS imposes an arbitrary limit on discharge current, determining the minimum number of batteries required. For example, you want to build a 12V system that supplies 300A continuous current to a Multiplus 3000VA inverter. This would require a minimum of three or four batteries if the BMS on each limits current to 100A.
Another issue is high inrush current associated with large inverters can damage an internal BMS—for an external BMS all battery current need not flow through it.
While Victron does offer drop-in solutions with an internal BMS, I do not believe it makes sense to go this route because you would lose these advantages.
Lynx Smart BMS
I considered other Victron BMS products but decided on the Lynx Smart BMS, it is expensive but encompasses several devices in one. In addition to BMS functionality, it includes an onboard battery monitor, contactor, and pre-charge circuit.
The contactor facilitates installation of a low current remote switch—I used a toggle switch with safety cover—for main power cutoff. It also acts as a failsafe by cutting power to the system if low cell voltage is detected.
The Lynx BMS also contains an AUX power port for a Cerbo to be kept alive after a system shutdown for troubleshooting.
Lastly, the Lynx BMS seamlessly connects with the Lynx Distributer and reports back fuse states.
They make it difficult to go any other way.
Cerbo GX
If your entire system is Victron, you should also include a Cerbo GX or similar communication center. These include control, monitoring, and numerous communication and I/O ports coordinating operation between various parts of the system. You can even control and monitor from anywhere in the world with VRM so long as it is connected to the internet.
I discuss why I purchased the Cerbo GX in greater detail in part 2 of this series.
Price Reduction
If none of the above were reason enough to go all Victron, their huge price drops in January 2024 are! The battery I was looking at, their Smart Lithium 24V 200AH (5.12 kWh), dropped from just over $2800 to $2120. This is what I paid for half the Battleborn bank size in 2018. The prices of other Victron products dropped as well. Sweet!
Next Up
In the next post I go from the big decisions made here to smaller ones, resulting in detailed electrical and structural designs.
Parts List
Here is a list of items we purchased to build our system.
You can navigate the Excel spreadsheet below directly or download the file through the download button on the bottom right.
We are Amazon affiliates and appreciate your purchases through the provided links.
We are also Tnutz affiliates. They offer the lowest prices on the web for aluminum extrusions, brackets, and much else. Before ordering through Tnutz check out this page to learn how to save on shipping.
Thank you!